Checkstands Tab
The Checkstands Tab is where Point-of-Sale (POS) Checkstands are assigned. To add and link your checkstands:
- From the Administration Menu, under Setup, click on System Information.
- Click on the “Checkstands” tab.
- To add a checkstand, press the Create Link Button. Create_Link(Note: the checkstands will appear here if they are set up on each Front End computer). The Checkstand Information form will pop up. In the Name field, type in the name of the computer as seen on the network. (If you do not know the name of the computer, click on My Computer, then View System Information. Click on the Computer Name tab.)
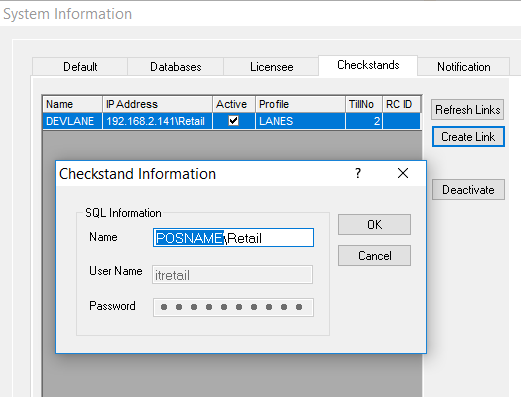
- The User Name and Password are setup during installation. These should not be changed.
- Press the OK Button.
- Repeat steps 3 through 5 until all of the checkstands have been linked.
- Press the Close button.
- Run Synchronize Checkstands with Setup.Synchronize_Checkstands_with_Setup
- To flag a checkstand as inactive, highlight the name and press the Deactivate Button.Deactivate_ Use this button to toggle from Active to Inactive.
- To refresh the links, press the Refresh Links Button.Refresh_Links
Synchronize_Checkstands_with_Setup