Miscellaneous Coupon Settings
To open Miscellaneous Settings, click on the Ellipsis button on the upper right of the form.

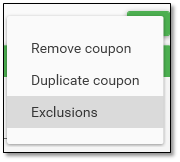
Remove Coupon: Click to delete the coupon. This will not physically remove the coupon from the database, but will mark it Disabled and remove it from view in the Coupon Engine.
Duplicate Coupon: Click to make a clone of the coupon. After duplicating, you can change the UPC, Name, and Savings amounts to make a new coupon. Make sure to click Enable coupon after making the changes. This is useful when stacking coupons.
Exclusions: This is used to exclude Departments or UPCs from being used to trigger the minimum amount.
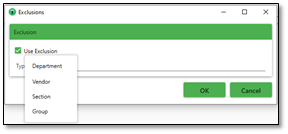
- Click on Exclusions. The Exclusions form opens up.
- Select the criteria, for example, you may want to exclude the Alcohol Department.
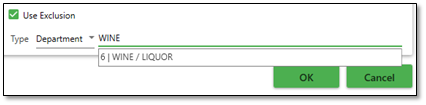
- Enter either the Department number or start typing the name to bring up a list of departments.
- Click OK to save the setting.
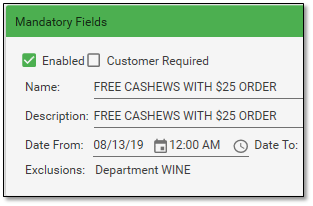
- The exclusion will only apply to the current coupon being created, and will be displayed in the Mandatory Fields.
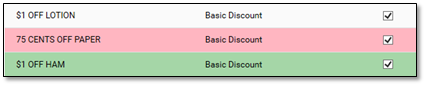
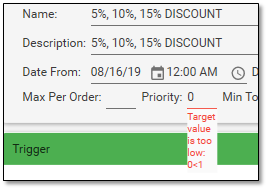
Errors displayed in Red or Green: If a coupon has been saved with errors, it will be displayed in red or green.
- In the example below, coupons were saved with errors or missing information.
- Click on the coupon to open and view the error. In the example, the Priority was saved as ‘0’. The description shows that the Target value is too low.
- Edit the coupon (in this case, the value should be changed to ‘1’) and press Save.
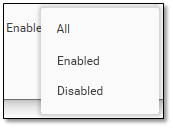
Viewing Coupons: You can view the coupons in the grid using different criteria. Go to the bottom left of the form.

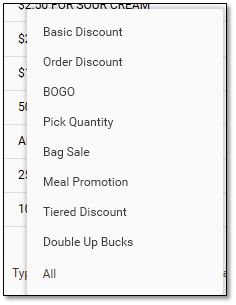
- Click on Type to bring up the list of coupon types and make your selection.
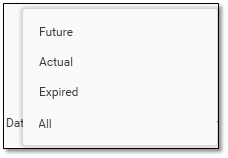
- Click on Date to select from Future, Actual, Expired, or All.
- Click on Enabled to select from All, Enabled or Disabled.
- NOTE: All of these search criterion can be drilled down, for example, you can select Basic Coupon, Enabled and view only those coupons with that criteria.