Schedules Maintenance
Schedule Maintenance is used to set limits on the hours and days a product can be sold. The system allows up to ten schedules to be created. For example, some states limit the days or hours during which alcohol can be purchased.
From the Administration Menu, under Maintenance, click on Schedule Maintenance.
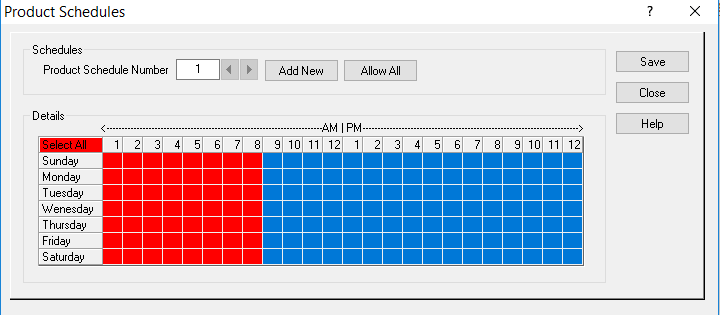
- To add a schedule click on the Add New ButtonAdd_New. The system will assign the next consecutive number and display it in the Product Schedule Number field.Product_Schedule_Number
- In the Details section select the times and days you would like the schedule to be in affect. Blue boxes indicate that items can be sold on that day and time and Red boxes signify the times and days that selling is restricted. For Example: A Red Box under number 10 will prohibit the product being sold from 10:00 to 10:59. A Blue Box under number 11 will enable the product to be purchased beginning from 11:00 to 11:59.
- To select all of the times and days, click “Select All” (highlighted in red). To allow all of the times, press the Allow All ButtonAllow_All_Button.
- Select individual times by clicking in the day and time grid box. You may click and drag your cursor to select a block of time, or click in each individual square.
- To edit a schedule, press the arrow button to a desired schedule to be edited. Make your selections by clicking in the grid box to change colors from red to blue and vice versa.
- Press the save button and close the screen.
- Synchronize the lanes with Setup.
- After your schedules are set up, they may be applied to products via Product Maintenance and sections via Section Maintenance. The schedules that are applied to sections are only applicable when ringing up open sections.