The Ordering form is used to create Purchase Orders for the store.
A list of Ordering Templates is displayed. Select the Template, in this example PO.
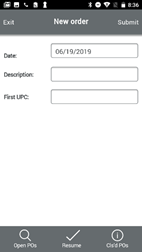
By Default you are brought to the New Order Screen. Enter a Description for your order and begin Scanning.
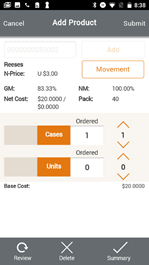
After scanning an item, you are prompted to enter the amount of Cases or Units you would like to order. Select Submit and continue scanning items to add them to the order.
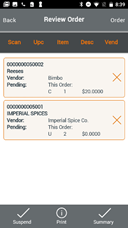
Select Review to look at all the items in the order.
Within the Review Order screen, you can remove or edit the items in your order by clicking on the item to Edit it, or selecting the “X” to remove the item.
When reviewing note that you can see how many Cases you ordered or Units.
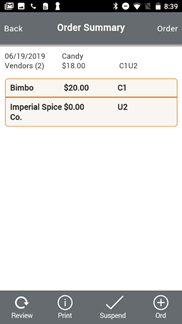
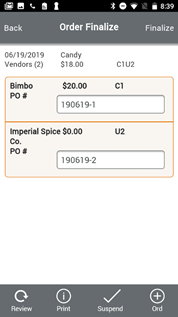
Select Summary. If you want to add more items to the order Select the “+Ord” button at the bottom right of the screen. If you are finished Select Order at the top righthand corner of the screen.
You can Print your order here and Finalize.
Note there is also an option to Review your order again if needed or Suspend your order if you need to come back to it later.
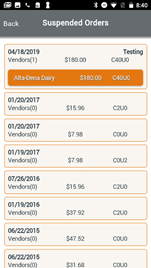
Back in the initial Ordering screen you can view Open Purchase Orders, Closed Purchase Orders or Resume suspended Purchase orders. Select Resume.